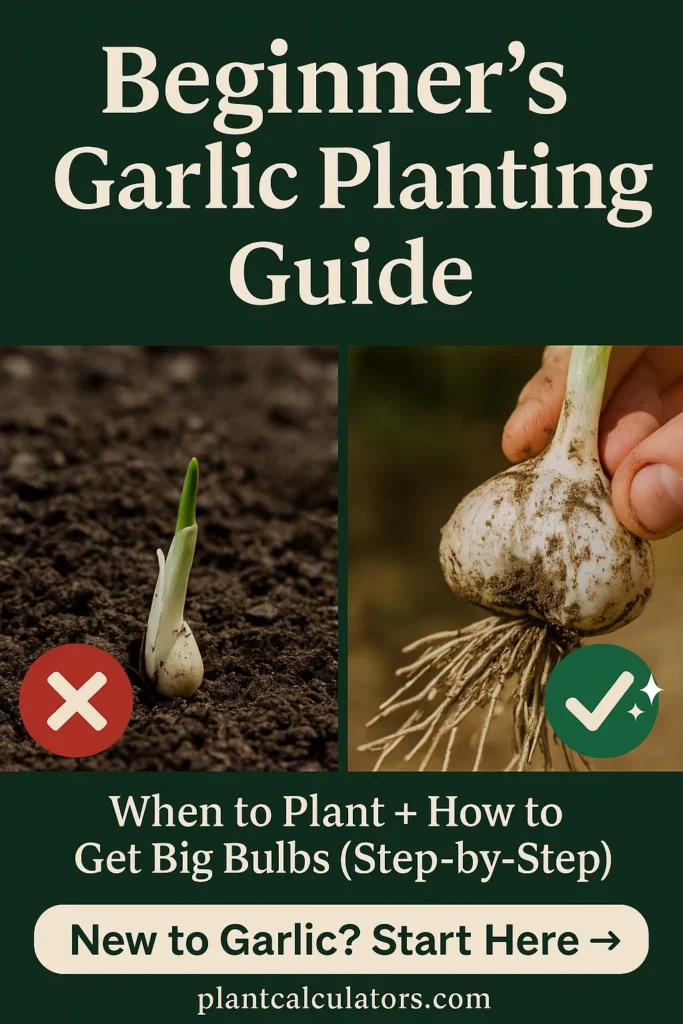
How to Grow Garlic: A Step-by-Step Guide for Beginners
Garlic is one of those crops that quietly becomes a staple in just about every home garden — and for good reason. It’s easy to grow, takes up little space, stores well, and the payoff is far more flavorful than anything you’ll get at the store. If you’re wondering how to grow garlic and do it in a way that gives you a solid harvest year after year, you’re in the right place.
In our zone (Central NY), garlic thrives through the long, cold winters and bursts to life in the early spring. But no matter where you’re gardening — raised beds in suburbia, containers on a patio, or a full kitchen garden — the fundamentals of growing garlic stay more or less the same. The key is understanding which type of garlic suits your region, knowing when to plant, and giving it a strong start.
We’ve grown garlic for years here on our small acreage, and each season has taught us something new. This guide walks you through everything we’ve learned — from selecting seed garlic to harvest and storage — broken down step-by-step, so you can feel confident putting cloves in the ground.
Whether you’re starting with a store-bought bulb or specialty seed garlic, or simply curious about how long does garlic take to grow, we’ll cover all of it. You’ll also find tips on growing garlic inside and how to grow garlic from a clove properly — including a few things we wish we knew before our first planting.
Table of Contents
Understanding Garlic Varieties
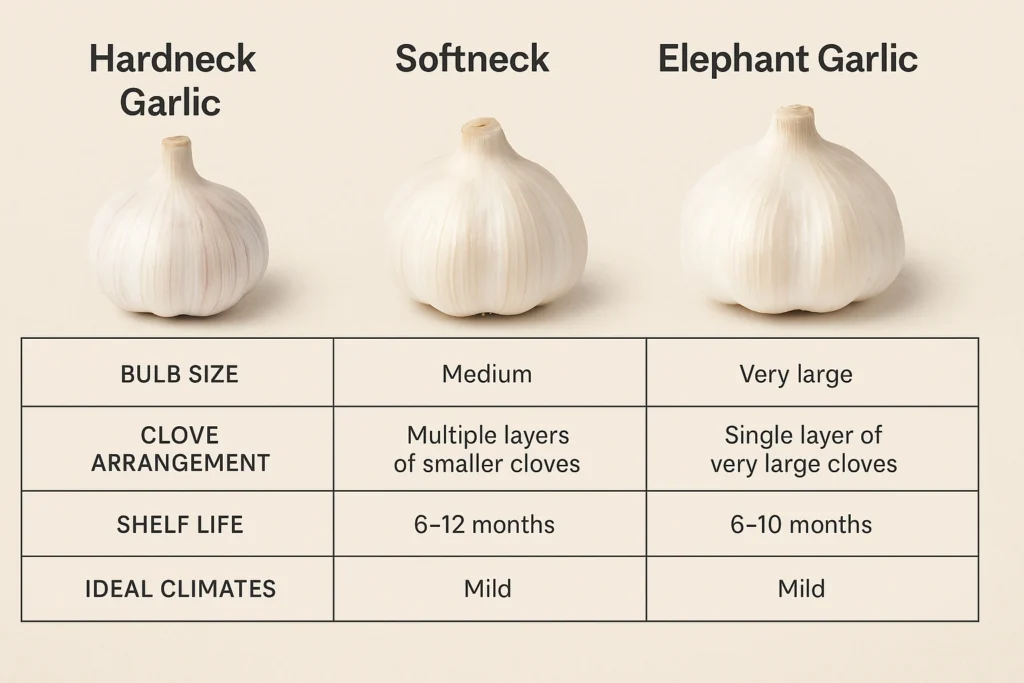
Before you get into the hands-in-the-dirt part of planting, it’s worth understanding what kind of garlic you’re working with. Knowing this upfront can make a big difference — in how your garlic grows, how it tastes, and how long it stores.
Hardneck vs. Softneck Garlic
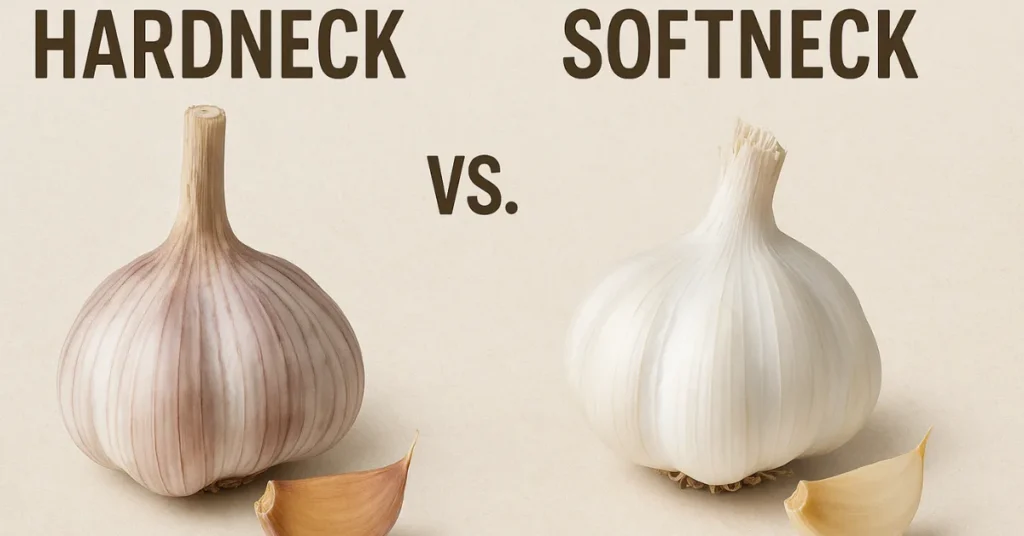
If you’ve ever pulled a garlic bulb from the ground and noticed a stiff, central stalk running through it, that’s a hardneck. Hardneck garlic is typically grown in colder climates because it needs a good chilling period — known as vernalization — to form large bulbs. What we love about hardneck varieties is their depth of flavor. You’ll also get garlic scapes in early summer, which are those curly green stalks that taste like a cross between garlic and chives. They’re a bonus crop all on their own.
Softneck garlic, on the other hand, is what you’ll usually find at the grocery store. It stores longer, doesn’t produce scapes, and prefers milder winters. These don’t need the same cold period that hardneck types do, which makes them a better fit for southern growers or folks trying to grow garlic indoors.
If you’re just learning how to grow garlic, either type will work — but make sure to match your variety to your region. In our Northern climate, we’ve had the best results with hardneck types like ‘Music’ and ‘German White’. Softnecks like ‘Inchelium Red’ and ‘California Early’ are great for warmer zones or container growing.
What About Elephant Garlic?
Now, elephant garlic technically isn’t garlic at all. It’s more closely related to leeks, though it looks the part. The cloves are massive and milder in flavor — great for roasting whole or mellowing out a dish. It’s not our go-to for everyday cooking, but it has its place in the garden if you’ve got the space.
Understanding the differences between garlic varieties sets the foundation for everything else. Whether you want bold, spicy cloves or long-storing mild bulbs, this choice influences your whole growing season.
How to Grow Garlic?
If you’re here looking into how to grow garlic from a clove, your first step is choosing the right clove — and that starts with knowing what you’re planting.
Preparing for Planting
Once you’ve picked your variety, it’s time to give your garlic the best possible start. Garlic isn’t fussy, but like most crops, it thrives in well-prepared soil with good drainage and steady nutrients. Whether you’re growing in rows, raised beds, or a few containers on the porch, getting your planting space dialed in makes all the difference.
We’ve learned (sometimes the hard way) that skipping the prep work almost always shows up later — usually in the form of small bulbs or rot.
Choosing the Right Soil
Garlic prefers loose, well-draining soil with a neutral to slightly acidic pH — around 6.0 to 7.0 is ideal. Heavy clay or compacted beds can cause the bulbs to struggle and split poorly. If your garden tends to hold water or crust over, work in compost or well-aged manure to loosen it up.
Before you plant, test your soil. It’s the one step that many gardeners skip, but it tells you exactly what your garlic will be up against. If you’re not sure where your soil stands, plug your numbers into our Soil pH Calculator to adjust accordingly.
You can also use the Soil Fertilizer Calculator to make sure you’re adding nutrients in the right balance. Garlic needs a good shot of nitrogen early on, then backs off as bulbs begin to form.
Prepping the Bed or Containers
We like to use the Raised Garden Bed Soil Calculator to plan how much soil to fill our beds ahead of time. If you’re planting in rows, use the Garden & Plant Spacing Calculator to keep your cloves properly spaced and avoid overcrowding — which leads to stunted bulbs and higher disease pressure.
Make sure the bed is weed-free and raked smooth before planting. Garlic doesn’t compete well with aggressive weeds, especially in its early stages. A thick layer of mulch after planting (straw is our go-to) helps keep moisture even and weeds out.
How to Grow Garlic in Containers?
If you’re limited on space or just experimenting, garlic can do well in deep containers — at least 10–12 inches. Use a high-quality potting mix with good drainage and consider blending in some compost. Make sure to keep the container in a sunny spot; garlic needs 6+ hours of direct sunlight per day. If you’re planning to grow garlic inside, just know that light will be your biggest challenge — more on that later.
For growers who are asking how to grow garlic and want to avoid over- or under-planting, check out our Bulb Spacing Calculator. It’s a great tool for mapping your space before you dig in.
Getting your soil right and your spacing clean sets the stage for the rest of the season. It’s easy to overlook these early steps, but garlic is one of those crops that rewards a thoughtful start.
When to Plant Garlic?
If you’ve got your garlic variety picked and your soil prepped, the next big question is timing. Planting at the right time is critical — too early and you risk premature top growth; too late and the cloves may not root before winter. We’ve learned that garlic likes to go to sleep before the ground freezes, but not too long before.
For most growers in the U.S., especially in colder regions like ours, fall is the best time to plant garlic. Mid-October is the sweet spot here in Central NY, though southern growers might stretch that into November. Garlic needs several weeks to establish roots before hard freezes set in. It will then go dormant through winter and kick back into gear with the first thaw.
Spring Planting?
Yes, you can plant garlic in early spring, but the results tend to be smaller bulbs. In warmer climates, or for those growing garlic inside or in containers, a very early spring planting can still work — just temper your expectations. If you’re wondering how long does it take for garlic to grow from a spring planting, you’re still looking at around 90–120 days from the time it breaks dormancy, but again, the size and storage life often suffer.
For a detailed look at planting times by region, we’ve put together a dedicated guide:
👉 When to Plant Garlic
This tool lets you dial in your zone and get planting dates that match your frost schedule. If you’re serious about learning how to grow garlic successfully, don’t skip this step — planting at the right time is half the battle.
It might be tempting to rush the process, but garlic is a long game crop. Put it in at the right time, and it will do the rest.
How to Grow Garlic from a Clove?
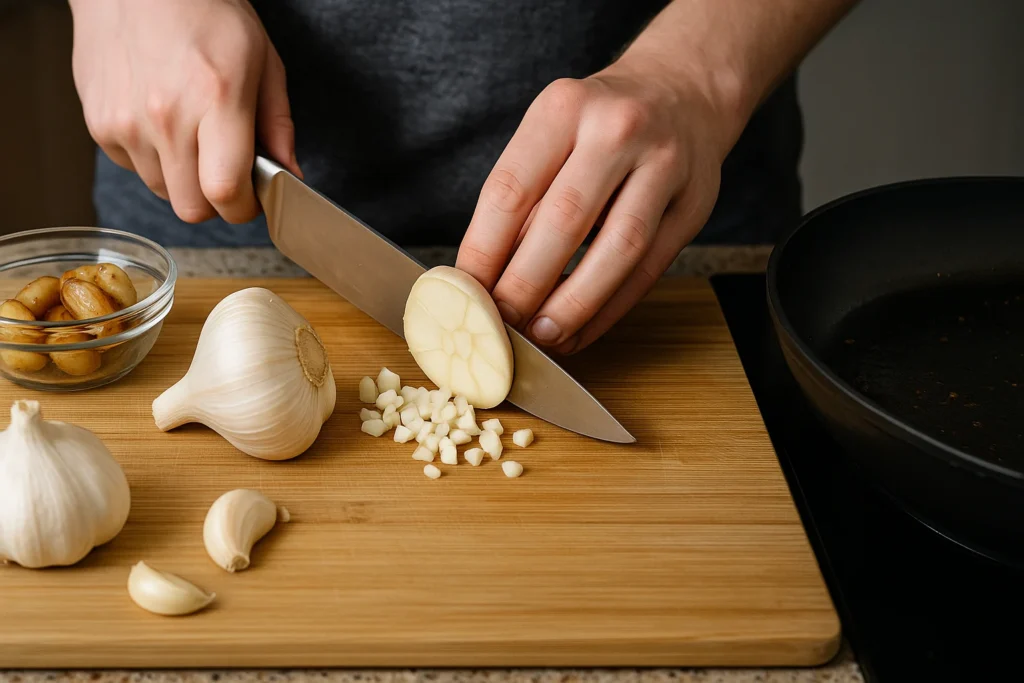
This is the part most folks picture when they think about how to grow garlic — breaking apart a bulb and pressing cloves into the soil. And really, that’s the beauty of garlic: simple, satisfying, and surprisingly forgiving when done right.
Each individual garlic clove you plant will grow into a full head by season’s end — but it only works if you plant them correctly. Not all cloves are created equal, and a few basic habits will go a long way toward success.
Step-by-Step: How to Grow Garlic Clove by Clove
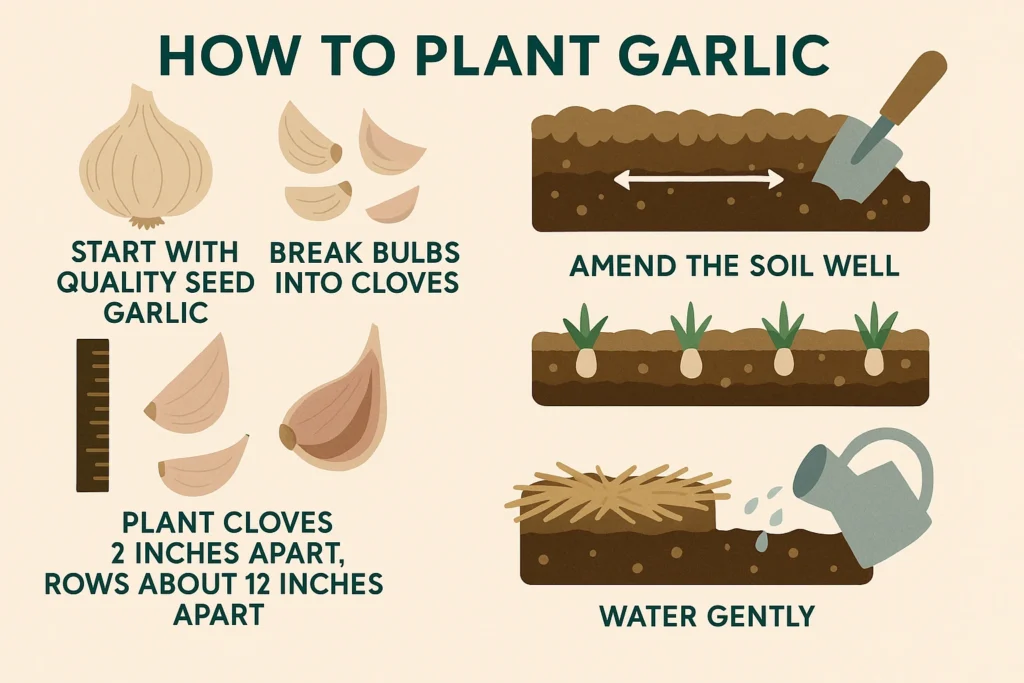
1. Break the Bulbs
Start by gently separating the cloves from the bulb, ideally the same day or week you plan to plant. Try not to damage the papery skins — they protect the cloves from disease and moisture loss. Use only the largest outer cloves for planting. Save the small interior ones for the kitchen. Those tiny cloves will grow, but often produce underwhelming bulbs.
2. Orient the Clove Correctly
This might seem basic, but it’s critical: plant with the pointy end facing up and the flat root end down. That’s how you ensure the roots go down and the greens shoot up. An upside-down clove will still try to grow, but it wastes energy twisting around underground.
3. Depth and Spacing
Plant cloves about 2 inches deep — deeper if you’re in a region with harsh winters — and space them 4–6 inches apart. If you’re planting multiple rows, leave 8–10 inches between rows. Proper spacing ensures good airflow, bulb development, and easier weeding. If you’re unsure how much room you’ll need, run your plan through our Bulb Spacing Calculator for a quick layout.
4. Mulch Right After Planting
We mulch immediately after planting, usually with straw or shredded leaves. A few inches of mulch helps insulate the cloves during winter, prevents frost heaving, and cuts way down on spring weeding. Mulching also locks in soil moisture — especially helpful if you’re growing garlic inside or in raised beds.
Tip for Beginners: Don’t Overthink It
There’s a lot of talk about garlic spacing, soil temps, and fertilizers, and while those things matter, the most important thing is to just get it in the ground correctly. We’ve had bulbs we forgot about, planted late, and they still produced. It may not be prizewinning garlic, but it’s still homegrown — and often better than store-bought.
So if you’re just now getting serious about how to grow garlic from a clove, start simple, plant well, and let the garlic do its thing.
How Long Does Garlic Take to Grow?
If there’s one thing that catches new growers off guard, it’s just how long garlic takes. Unlike lettuce or radishes, which you can harvest in a matter of weeks, garlic plays the long game. But once you understand the rhythm, it becomes one of the easiest crops to manage.
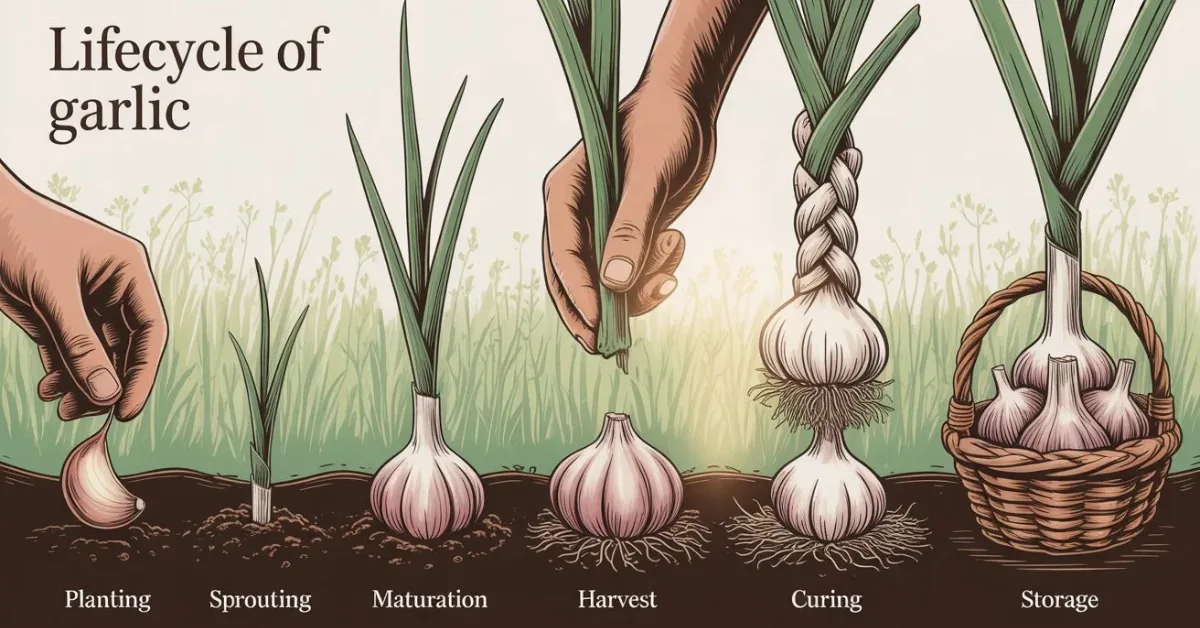
From the day you plant a clove to the moment you dig up a full bulb, garlic typically takes 7 to 9 months to fully mature. It might sound like a lot, but most of that time garlic is growing quietly in the background, asking for very little.
Understanding how long does it take for garlic to grow helps set expectations, especially if this is your first time learning how to grow garlic. Here’s a basic seasonal breakdown of what to expect:
Garlic Growth Timeline
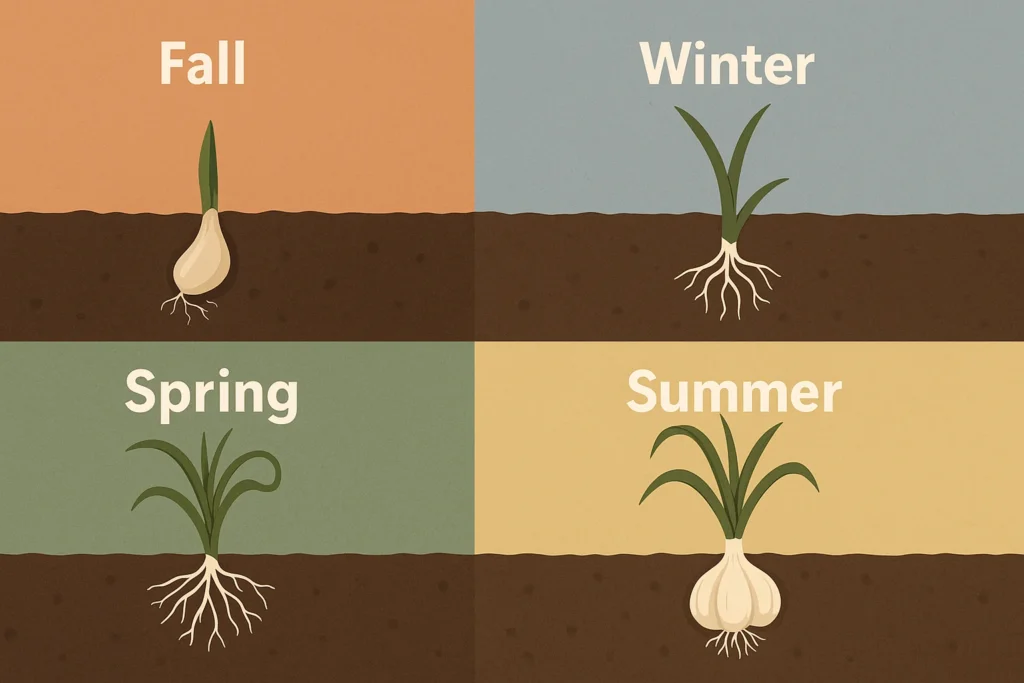
Fall (Planting & Rooting):
Right after planting, garlic cloves begin to develop roots. In a few weeks, you might see green shoots poking up — especially if fall stays mild. That’s a good sign. Don’t worry if cold weather knocks them back; they’ll bounce back come spring.
Winter (Dormancy):
This is garlic’s quiet phase. Underground, the roots are still holding steady, but above ground, not much happens. This cold period is essential for hardneck garlic — it triggers proper bulb formation later.
Spring (Growth Spurt):
As soon as the soil warms, garlic takes off. Leaves shoot up quickly, and this is when the plant starts photosynthesizing and sending energy into forming bulbs. If you’re growing hardneck garlic, you’ll also see garlic scapes around late spring to early summer.
Summer (Bulbing & Harvest):
Bulb formation starts in early summer and continues until the lower leaves begin to yellow — that’s your sign that harvest is coming. Timing is important here: harvest too early and the bulbs won’t be fully developed; too late and they may split or rot. We’ll cover exact harvesting signs in an upcoming section.
If you’re trying to figure out how long does garlic take to grow indoors, the answer is roughly the same — but you’ll need to give it steady light and consistent temperature. Without the benefit of outdoor dormancy, container-grown garlic may grow slower or produce smaller bulbs, but it’s still completely doable.
Want to avoid guessing games? Bookmark our Garden & Plant Spacing Calculator and Soil Fertilizer Calculator to help garlic get what it needs at every stage.
Time and patience are the biggest inputs here. But the payoff — a basket of garlic you grew yourself — is well worth the wait.
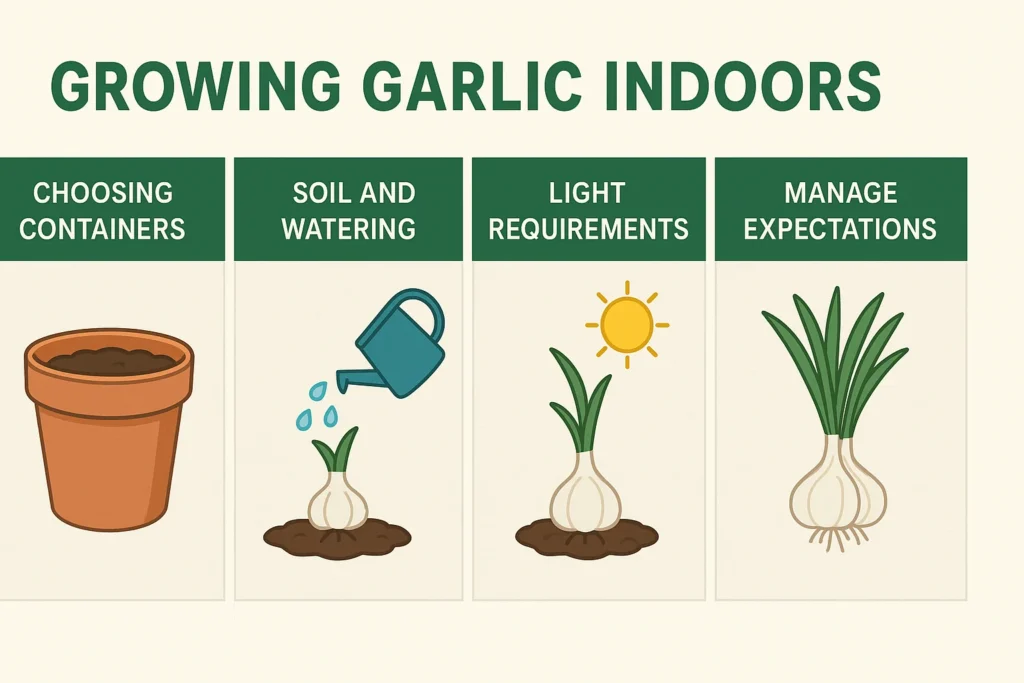
Growing Garlic Indoors
Not everyone has a backyard or a raised bed to work with — and that’s okay. If you’re short on outdoor space or just curious about how to grow garlic indoors, the good news is that it can be done. It won’t yield the same giant bulbs you’d get in the garden, but with the right setup, you can still grow healthy, flavorful garlic at home.
We’ve tested a few indoor grows ourselves over winter, mostly out of curiosity (and impatience). The key challenges indoors are space, drainage, and light — and we’ll walk through how to manage all three.
Choosing Containers
Start with a deep, well-draining container — at least 10–12 inches deep. Garlic roots grow long, and shallow pots will stunt their development quickly. We’ve had good luck using fabric grow bags or standard nursery pots with drainage holes. If you’re tight on space, grow fewer cloves, but don’t crowd them — garlic needs room.
Not sure how much potting mix to use? Run the numbers with our Raised Garden Bed Soil Calculator, which works just as well for containers. It’ll help you avoid overfilling or underplanting your setup.
Soil and Watering
Use a loose, nutrient-rich potting mix — ideally one that includes compost or coco coir for better moisture retention. Garlic doesn’t like soggy roots, so make sure that water drains freely from the bottom of the pot. Water consistently, keeping the soil evenly moist but never saturated.
If you’re unsure about nutrient levels, check your mix with our Soil Fertilizer Calculator. Garlic indoors still needs feeding — especially nitrogen during early leaf development.
Light Requirements
Here’s the catch: garlic needs a lot of light. A south-facing window might work, but more often than not, you’ll need a grow light. Aim for 12–14 hours of light a day to mimic springtime sun. Without it, garlic will grow leggy and weak, and bulbs won’t develop properly.
If you’re asking how to grow garlic clove by clove indoors, this is where it can get tricky. Each clove still needs space, drainage, and light — just like it would in a garden bed. But indoors, everything is more compact, and any weak link (like low light or poor drainage) tends to show up fast.
Manage Expectations
Garlic grown indoors may not reach the full size of outdoor bulbs, but you can still get delicious green garlic or even small heads if conditions are right. Green garlic is harvested young, similar to scallions, and has a milder flavor. It’s fantastic in soups, stir-fries, or anywhere you’d use a soft garlic note.
Indoor growers curious about how to grow garlic from a clove should start small and dial in their setup. Once you get it right, it’s a rewarding winter project — and you can always transplant outside when the weather warms.
Maintenance and Troubleshooting
Garlic is low-maintenance, but not hands-off. A few well-timed tasks go a long way toward ensuring strong, healthy bulbs at harvest. Once you’ve got the cloves in the ground (or in containers), it’s about staying ahead of weeds, watching water levels, and keeping an eye out for pests and diseases.
Most of what we’ve learned about how to grow garlic well has come from the problems we’ve had to fix.
Watering Wisely
Garlic likes consistent moisture — especially during spring when it’s putting on leafy growth. But too much water can lead to rot. As a rule of thumb, water deeply but less often. Beds should dry slightly between waterings. If you’re growing garlic indoors, use pots with good drainage and never let them sit in water.
Use our Compost Calculator if you’re mixing compost into your beds or containers — it helps you avoid overdoing it, which can lead to soggy soil conditions.
Weed Management
Garlic doesn’t compete well with weeds. Its tall, narrow leaves don’t offer much canopy coverage, so weeds can crowd it out fast. We rely heavily on mulch — usually straw or shredded leaves — to suppress weeds and keep moisture levels steady. It also protects young shoots during late frosts.
Pests and Diseases
Garlic doesn’t have many pest enemies, but a few can sneak in:
- Onion maggots: They lay eggs near the base of the plant and the larvae burrow into the bulb. Crop rotation helps a lot here — avoid planting garlic or other alliums in the same spot every year.
- Fungal rot: Usually caused by poor drainage or overcrowding. Proper spacing and well-drained soil are your best defenses.
Soft rot and white rot are the big issues to watch for in damp climates. If you’ve dealt with either before, solarize your soil or skip that area for garlic the next season.
If you’re growing in containers and wondering how to grow garlic clove by clove without these issues, sterilizing your soil mix and avoiding reused potting mix can help reduce fungal spores.
Bolting and Garlic Scapes
Hardneck garlic will send up a flower stalk in late spring — that’s the scape. If you leave it on, the plant will spend energy on flowers instead of the bulb. We always cut ours as soon as they curl once or twice. It redirects energy below ground and gives us tasty bonus greens for stir-fries and pesto.
And yes — if you’re growing garlic inside, your plant might not form a scape at all depending on light and stress levels. That’s normal.
If you’re committed to mastering how to grow garlic, keeping ahead of these common issues will set you up for the healthiest crop possible.
Harvesting and Curing Garlic
If you’ve made it this far in the garlic-growing journey, harvest time is right around the corner — and it’s one of the most rewarding moments in the garden. But knowing exactly when and how to dig up your garlic is just as important as knowing how to grow garlic in the first place. A few extra days in the ground, or the wrong storage setup, can make or break your crop.
When to Harvest Garlic?
Timing harvest is about watching the leaves. Garlic plants will send up tall green stalks in spring and early summer. As summer rolls on, those green leaves begin to yellow and dry — starting from the bottom up.
The rule of thumb we use: when 3 to 5 of the lower leaves have turned brown and the upper leaves are still green, it’s time to harvest. If you wait too long, the wrappers around the bulbs begin to split, and the garlic won’t store as well.
For anyone wondering how long does garlic take to grow before it’s ready, this leaf-watch method is more accurate than counting days. Every season is a little different, and environmental factors like rain or heat waves can speed things up or slow them down.
How to Harvest Garlic (Without Damaging It)?
Don’t pull it out by the stalk — that’s a good way to snap the stem or bruise the bulb. Instead, take a garden fork and gently loosen the soil a few inches out from the bulb. Then lift it up, shake off excess soil, and lay it gently on the surface.
If you’re using a garlic bed with a lot of compacted soil, or growing garlic inside in deep containers, loosen the sides before lifting to avoid tearing the roots or bulbs.
Damaged garlic won’t cure properly and will rot faster in storage, so be patient during this step.
Curing Garlic for Storage
Curing is the process of drying out the garlic after harvest. This toughens up the outer skins and locks in flavor. Without curing, garlic will rot in storage.
Here’s how we cure garlic:
- Hang or lay out the plants (whole — don’t trim yet) in a shady, dry, well-ventilated place.
- Avoid direct sunlight. Sun can “cook” the bulbs and cause them to go soft.
- Cure for 2 to 3 weeks, or until the wrappers are dry and papery and the necks are stiff.
If you’re working with a big harvest, you can use a wire shelf, a drying rack, or even a garage wall — just make sure air can move around each bulb.
Once fully cured, trim the roots and stalks, then store garlic in a cool, dry place — ideally around 60°F. Avoid sealed containers or fridges. Mesh bags, paper bags, or baskets all work well.
Whether you’re curing a whole season’s worth of garlic or just a few bulbs grown indoors, the process is the same — and it’s the final step in learning how to grow garlic from start to finish.
Propagating Garlic for Future Plantings
One of the best things about garlic is that each bulb you harvest holds next season’s crop. If you plan ahead just a little, you’ll never need to buy seed garlic again — just save the best of what you grow. Once you’ve learned how to grow garlic successfully, saving your own planting stock is the next natural step.
We’ve been replanting from our own harvest for years now. Not only does it save money, but your garlic gradually adapts to your local growing conditions over time. That’s the kind of slow, quiet benefit you don’t get from store-bought cloves.
Choosing What to Save
After curing, set aside your biggest, healthiest bulbs. Size matters here — large cloves lead to large bulbs. Don’t save any that look damaged, moldy, or soft. We also avoid bulbs with fewer than five or six cloves, since they don’t yield well the next season.
When you’re deciding how many to save, count how many heads of garlic your household uses per week. Multiply that by how many weeks of garlic you’d like to store, and then add 20–30% to replant. If you’re unsure how much space that’ll take, plug your numbers into the Bulb Spacing Calculator to map out next year’s rows.
Storage for Seed Garlic
Keep your saved garlic in a cool, dry place with good airflow. Avoid storing it in plastic or sealed containers — mesh or paper bags are best. If you’re growing garlic indoors and want to hold cloves for spring planting, make sure they don’t sprout too early by keeping them away from heat sources.
When to Split for Replanting
Wait until just before planting to split the bulbs into individual cloves. This protects them from drying out or getting damaged in storage. Remember: only plant the largest outer cloves — eat the rest.
Whether you’re planning for fall planting or experimenting with how to grow garlic clove by clove in containers, keeping a few heads from each season ensures you always have a fresh start.
This is where garlic starts to feel like part of your long-term garden rhythm — harvest, cure, store, and save. Do it right, and it becomes a self-sustaining cycle.
FAQs and Additional Resources
Even after growing garlic for years, new questions still pop up. Below are some of the most common things people ask — whether they’re planting their first clove or troubleshooting an indoor grow. If you’re still learning how to grow garlic, these quick answers should help clear the air.
Can I grow garlic from store-bought bulbs?
Yes — but with some caveats. Store garlic is often treated to prevent sprouting, and it may carry soil-borne diseases. For best results, start with certified seed garlic. That said, we’ve used organic grocery store garlic in a pinch, and it worked — just don’t expect top-tier performance.
What’s the difference between green garlic and garlic bulbs?
Green garlic is harvested young, before the bulb has fully formed. It looks like a scallion and has a mellow garlic flavor — great for sautés and soups. If you’re short on time or growing garlic inside, harvesting green garlic is a solid option.
Do I need to fertilize garlic?
Yes — especially early in the growing season. Garlic is a heavy feeder in spring when it’s pushing out foliage. Use a nitrogen-rich fertilizer, then back off as the plant starts forming bulbs. You can calculate exact fertilizer amounts using our Soil Fertilizer Calculator.
How do I prevent garlic from rotting?
Rot is almost always a sign of poor drainage or overwatering. Make sure you’re using well-drained soil (our Soil Calculator can help with that), space your cloves properly, and avoid watering in the weeks leading up to harvest.
Can I grow garlic in water?
Technically, yes — but you’ll only get greens, not full bulbs. It’s a fun windowsill experiment, but if you’re serious about how to grow garlic for storage or cooking, soil is the way to go.
How many cloves should I plant?
It depends on how much garlic you use! To calculate how much space you’ll need, try the Garden & Plant Spacing Calculator or Bulb Spacing Calculator. They’ll give you a planting plan that matches your garden’s layout.
Can I grow garlic in pots all year?
Yes — especially if you’re in a warmer climate or growing indoors. Just be sure to use a deep container, water regularly, and provide strong light. For exact sizing, use the Raised Garden Bed Soil Calculator to get your volume right.
Other Guides & Tools on Our Site
We’ve put together a full suite of tools and articles to help you get the most from your garlic and garden:
Explore the rest of our plant calculators to help you make smarter planting decisions all year long.
Recommended Reading
For a deeper dive into garlic health, production practices, and pest management, we recommend this expert-backed guide from Penn State Extension:
👉 Garlic Production
It’s especially helpful if you’re looking to scale up your garlic growing beyond the backyard.