
How to Plant Potatoes
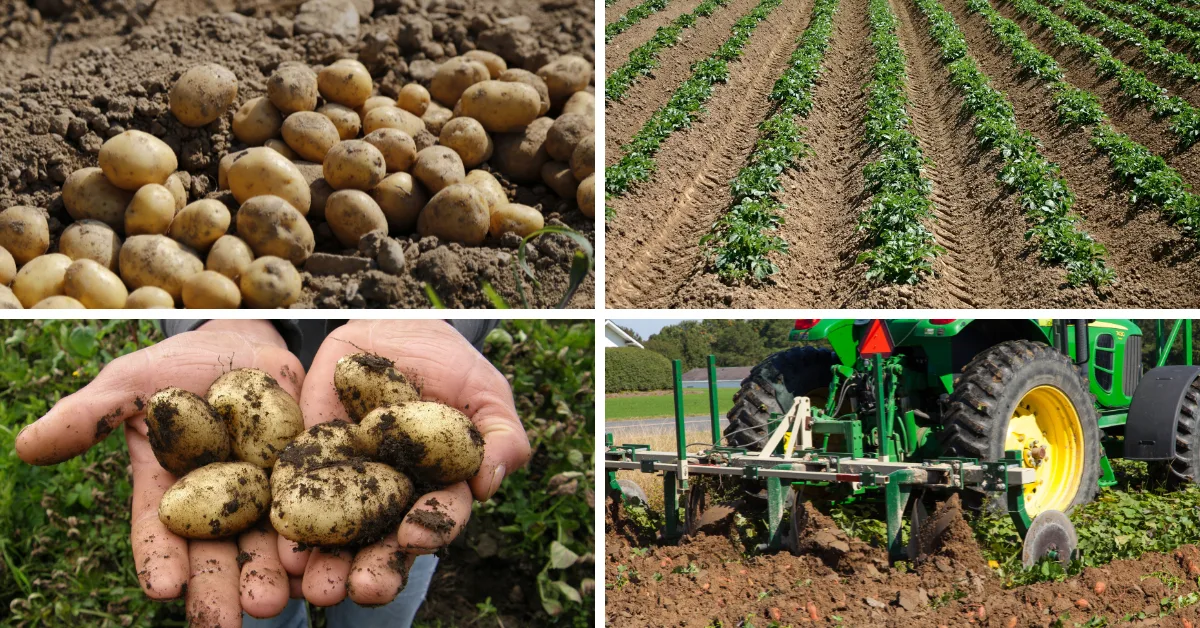
I’ll be honest—when I first started gardening, potatoes weren’t even on my radar. I figured they were cheap enough at the grocery store, so why bother? But once I harvested my first batch of homegrown spuds, I was hooked.
There’s something almost magical about pulling fresh potatoes straight from the soil, knowing you grew them yourself. The taste? Unreal. The savings? Surprisingly good. And the sustainability factor? A total game-changer.
In this guide, I’ll walk you through everything you need to know about planting potatoes and sweet potatoes—from choosing the right variety and preparing the soil to harvesting and storing your spuds for long-term use.
We’ll also cover essential tips like how deep to plant potatoes, how far apart they should be spaced, and unique methods like growing them in containers or grow bags.
Whether you’re looking to grow classic russet potatoes for baking, Yukon Golds for creamy mashed potatoes, or vibrant sweet potatoes packed with nutrients, this guide will help you get started.
By the end, you’ll have all the knowledge needed to grow a bountiful harvest—no matter how much (or little) space you have.
Table of Contents
When to Plant Potatoes?
Figuring out the best time to plant potatoes can feel like a guessing game, especially if you’re new to growing them. I’ve made every mistake in the book—planting too early and watching them freeze, waiting too long and missing the best window, and even trying to grow them in the heat of summer (spoiler: not a great idea).
But over time, I’ve learned that it all comes down to two things: your local climate and frost dates.
Understanding Your Growing Zone and Frost Dates
Before you even think about dropping a seed potato in the ground, you need to know your USDA growing zone and the average frost dates in your area. Potatoes are cool-season crops, meaning they grow best in temperatures between 45°F and 85°F. If it gets too hot, they stop growing. If it gets too cold, they can rot or fail to sprout.
For most gardeners in zones 3-7, the best time to plant potatoes is two to four weeks before your last expected spring frost. This gives the plants a head start while temperatures are still cool but not freezing. In zones 8-10, where winters are mild, you can plant potatoes in the fall for a winter harvest. Some folks in the deep South even plant them in January or February!
A quick tip: If you’re unsure about your local frost dates, plug your ZIP code into the USDA’s online frost date calculator or check the Farmer’s Almanac. Knowing when that last frost is likely to hit can save you a lot of heartache (and wasted potatoes).
Spring vs. Fall Planting: Pros and Cons
So, should you plant potatoes in spring or fall? Both have their advantages and challenges.
✅ Spring Planting (Most Common)
- Pros: More predictable growing conditions, longer daylight hours, and the best chance for a large harvest.
- Cons: Late frosts can kill young plants if you’re not careful.
✅ Fall Planting (For Mild Climates)
- Pros: Less pest pressure, cooler temperatures, and sometimes a sweeter-tasting potato.
- Cons: Shorter days can slow down growth, and early frosts can ruin your crop if you don’t time it right.
In my experience, if you live in an area with hot summers, fall planting can actually be better because your potatoes won’t have to fight extreme heat. But if your winters are harsh, stick to a spring planting schedule.
Can You Grow Potatoes Year-Round?
Technically, yes—but it takes some planning. If you live in a warm climate (zones 8-10), you can stagger plantings and grow potatoes in both fall and spring. But if you’re in a colder area, your best bet is to use indoor or greenhouse growing in the off-season.
Refer to Greenhouse Heating Cost Calculator to estimate the cost of the greenhouse.
One trick I’ve used successfully is growing potatoes in containers indoors. You just need a 5-gallon bucket or grow bag, some loose, well-draining soil, and a sunny window (or grow lights). It’s not as efficient as outdoor planting, but it’s a fun way to keep fresh potatoes coming year-round.
If you’re adventurous, you can even try hydroponic potatoes, but that’s a whole other experiment (one I’m still trying to perfect!).
Where to Plant Potatoes for Maximum Yield?
When it comes to growing potatoes, location is everything. You can have the best seed potatoes in the world, but if they’re planted in the wrong spot, your harvest will be lackluster at best.
I learned this the hard way when I first planted potatoes in a shady, compacted corner of my garden—half the crop was stunted, and the other half never even sprouted. The key is choosing a spot with full sun, loose soil, and just the right amount of moisture retention.
If you’re planting in your backyard, pick a location that gets at least six hours of direct sunlight daily. Potatoes are underground growers, but their leafy tops need sunlight to fuel that tuber development below.
A south-facing garden bed is ideal, especially if you’re in a region with shorter growing seasons. If you’re stuck with partial shade, try to position your rows to maximize morning light—potatoes seem to thrive better with cooler morning sun than harsh afternoon heat.
Drainage is another big factor. Potatoes hate soggy soil, and standing water can quickly lead to rot. If your garden tends to hold moisture, consider planting in raised beds or mounding up the soil to improve drainage.
A simple test? Dig a hole about a foot deep and fill it with water—if it takes more than an hour to drain, your soil needs amending with sand or organic matter before you plant.
The Best Soil for Potatoes: Loose, Well-Drained, and Nutrient-Rich
If you’ve ever pulled up a potato that looks more like a misshapen lump than a proper spud, chances are your soil was too dense. Potatoes need room to expand, which means loose, well-aerated soil is a must.
The best soil for potatoes is a sandy loam with plenty of organic matter. I like to mix in aged compost or well-rotted manure before planting—it gives the plants a slow-release nutrient boost.
The pH level matters too. Potatoes do best in soil with a pH between 5.0 and 6.5—slightly acidic but not extreme.
If your soil leans too alkaline (above 7.0), you might end up with scab, a rough-textured skin disorder that doesn’t harm the potato but makes it less appealing.
A simple soil test kit can tell you where your garden stands, and if necessary, you can lower the pH with peat moss or elemental sulfur.
Potatoes are also heavy feeders, meaning they’ll deplete nutrients quickly. I rotate my potato beds every year and follow them with nitrogen-fixing crops like beans or peas to naturally replenish the soil.
If you want a bigger yield, side-dress with a balanced fertilizer (like 10-10-10) when the plants are about six inches tall. Too much nitrogen, though, and you’ll get a lot of leafy growth with smaller tubers—lesson learned!
Sunlight Requirements: How Much is Enough?
Potatoes thrive on full sun, but there’s a fine balance between too much heat and just the right amount of light. Ideally, you want your potato plants getting 6 to 8 hours of direct sunlight every day.
More sun often means bigger tubers, but in regions with scorching summers, potatoes can struggle with heat stress.
One trick I’ve found useful is mulching around the plants with straw or dried leaves. This keeps the soil cooler and helps retain moisture. I’ve also experimented with partial shade cloth during heat waves, which kept my plants from wilting in extreme temperatures.
If you live in a cooler climate, on the other hand, you might get away with planting potatoes in an open area with all-day sun to maximize growth.
Another thing to consider is the length of the growing season. Potatoes need about 90-120 days to fully mature, so if you’re in a northern climate, plant early in the spring once the soil reaches at least 45°F (7°C).
In warmer climates, potatoes can be a fall and winter crop, provided they don’t have to endure excessive summer heat.
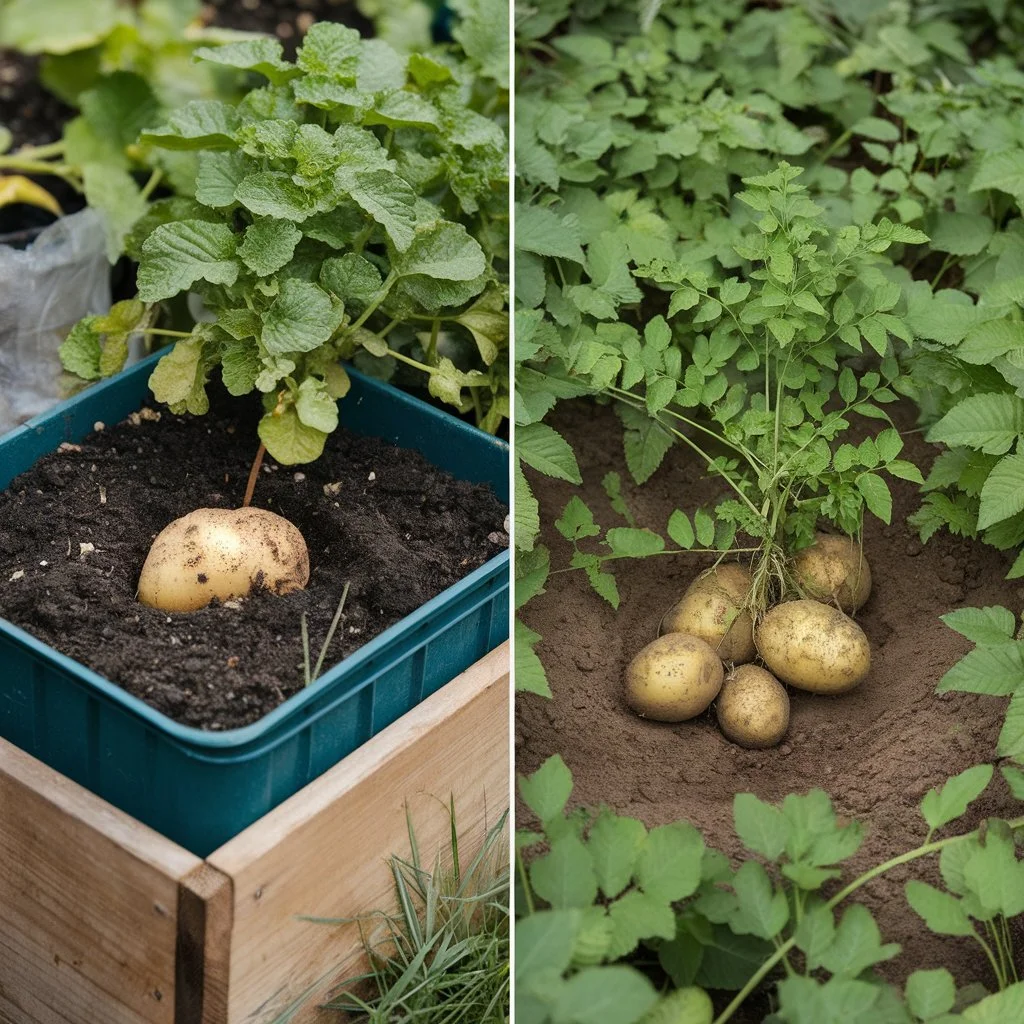
Container Gardening vs. In-Ground Planting: Which is Better?
Both container gardening and in-ground planting have their advantages, but if maximum yield is your goal, in-ground planting usually wins. I’ve grown potatoes in everything from fabric grow bags to plastic tubs, and while containers work well for small spaces, they dry out faster and can limit tuber expansion.
Container potatoes need consistent watering—about an inch per week—but be careful not to overdo it, as excess moisture can cause rot.
If you’re using drip irrigation, running it for about 30 minutes twice a week should keep the soil moist without waterlogging. You can use our Drip Irrigation Run Time Calculator to fine-tune watering times based on your setup.
For in-ground planting, you’ll get better results if you hill your potatoes—this means covering the lower part of the plant with soil as it grows, encouraging more tuber production. Space your seed potatoes about 12 inches apart in rows that are at least 30 inches apart. If you’re unsure how much space to leave, check out our Vegetable Seed Calculator for precise spacing recommendations.
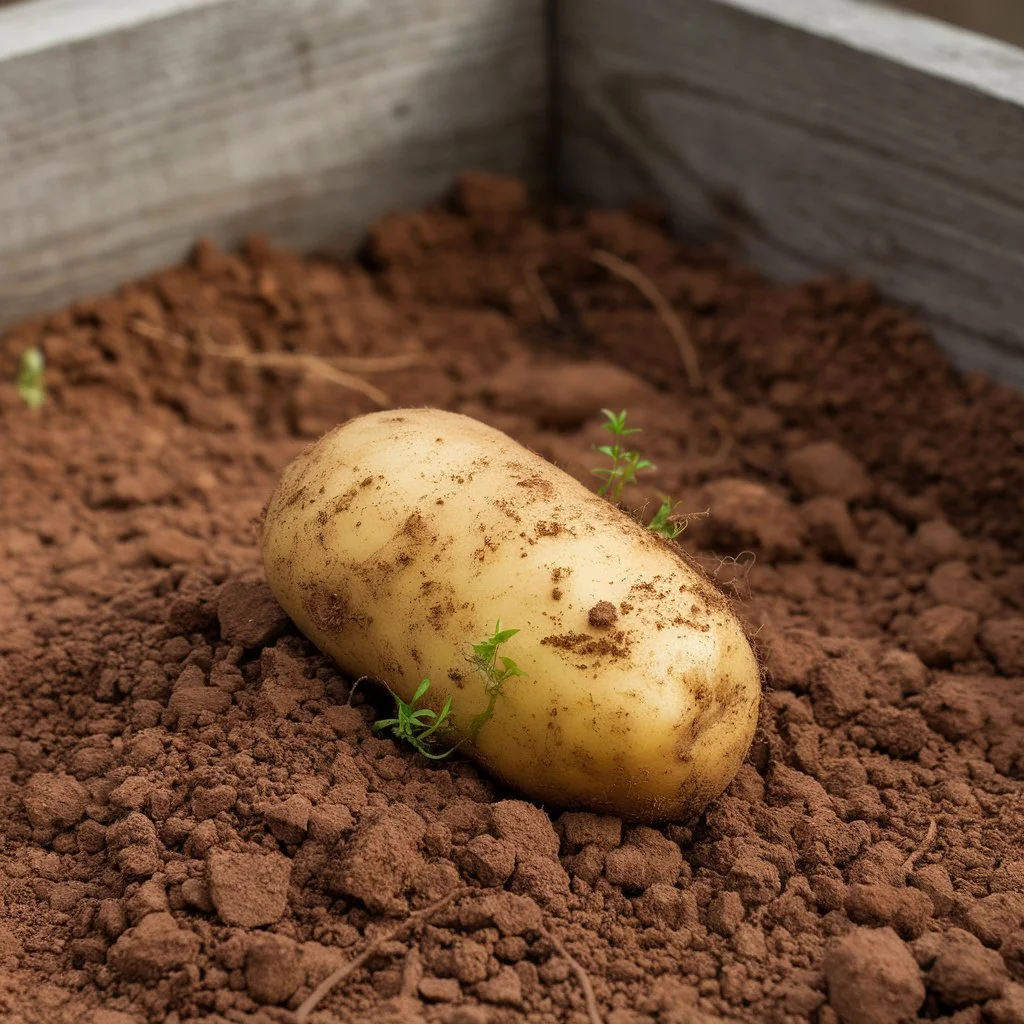
Preparing Your Seed Potatoes
Planting potatoes is one of the most rewarding things you can do in a home garden. They don’t require a ton of space, they store well, and there’s something oddly satisfying about digging into the soil and pulling out a fresh crop of spuds.
But if you want a great harvest, it all starts with preparing your seed potatoes the right way. Trust me—I’ve learned the hard way that just tossing whole potatoes into the ground doesn’t always lead to the best results.
Let’s talk about how to do it properly.
What Are Seed Potatoes and Why Should You Use Them?
First off, let’s clear up a common misconception—seed potatoes aren’t actually seeds. They’re just potatoes grown specifically for planting. Unlike grocery store potatoes, which are often treated to prevent sprouting, seed potatoes are disease-free and ready to grow.
If you’ve ever planted a store-bought potato and ended up with a sad, stunted harvest (or worse, rotting tubers), you know why seed potatoes are the way to go.
Using certified seed potatoes helps reduce the risk of common diseases like potato blight and scab.
They also ensure you’re getting a potato variety that’s suited for growing, not just eating. Some heirloom or specialty varieties, like ‘Yukon Gold’ or ‘Purple Majesty,’ aren’t always available in grocery stores, but you can find them as seed potatoes.
If you’re serious about growing a strong potato crop, don’t skip the seed potatoes. They might cost a little more upfront, but you’ll get bigger, healthier yields in the long run.
Cutting and Curing: How to Prep Seed Potatoes for Planting
Now, this is where I made my first mistake. The first year I planted potatoes, I didn’t cut them—I just planted whole ones, thinking they’d sprout from every eye. And while some did grow, they didn’t spread out as much as they should have. Here’s what I should have done:
- Cutting the Potatoes
- If your seed potatoes are small (about the size of a golf ball), plant them whole.
- If they’re larger (like a fist), cut them into pieces that are roughly 1.5 to 2 inches across, with at least one or two eyes per piece.
- Curing the Pieces
- This is the step most beginners skip (and then wonder why their potatoes rot in the soil). After cutting, lay the pieces out in a single layer in a cool, dry spot for 2-3 days.
- The goal is to let the cut edges form a thick, dry callus. This helps prevent rot and disease once they’re planted.
Pro Tip: If you’re in a humid climate, lightly dusting the cut pieces with wood ash or sulfur powder can help prevent rot.
Should You Sprout Potatoes Before Planting? Pros and Cons
This is a hot debate among gardeners—to chit or not to chit?
“Chitting” just means pre-sprouting your potatoes before planting by placing them in a warm, bright area for a couple of weeks. I used to think this was an unnecessary step, but once I tried it, I was convinced—it makes a big difference in early growth.
✅ Pros of Chitting:
- Speeds up growth – Chitted potatoes sprout faster once planted, meaning you might get an earlier harvest.
- Stronger plants – You can choose the best sprouts and avoid planting weak ones.
- Better for short growing seasons – If you live somewhere with a short summer, chitting helps maximize your growing window.
❌ Cons of Chitting:
- Extra step – If you’re short on time, you might not want to bother.
- Sprouts can break – If the sprouts get too long before planting, they can snap off when handling.
To chit potatoes, just place them sprout-side up (eyes facing up) in an egg carton or shallow tray near a window. In about two to three weeks, you’ll see short, stubby sprouts—those are what you want. Long, leggy sprouts aren’t ideal and usually mean they need more light.
If you’re in a rush or live somewhere warm, you can skip chitting, but if you have the time, it’s worth it.
How Far Apart to Plant Potatoes?
I’ll be honest—when I first started growing potatoes, I didn’t think spacing mattered much. I just threw the seed potatoes into the soil, covered them up, and hoped for the best. Well, let me tell you, that first harvest was a disaster.
The plants were too close together, the tubers were tiny, and half of them were scabby. That’s when I realized spacing is everything when it comes to potatoes.
The Ideal Spacing for Rows and Individual Plants
If you’re planting potatoes in a traditional garden bed or raised bed, spacing should be a top priority. The general rule of thumb is to plant seed potatoes 12 inches apart in rows that are 2.5 to 3 feet apart. This gives each plant enough room to develop a strong root system and grow large, healthy tubers. Check out our Vegetable Seed Calculator for precise spacing recommendations.
Why so much space between rows? Because potato plants get bushy. If they’re crammed together, airflow is restricted, which can lead to fungal diseases like blight. Plus, when it’s time to hill up the soil (which is crucial for protecting growing tubers from sunlight), you’ll appreciate having that extra space between rows to work with.
If you’re using a raised bed, you can get away with slightly tighter spacing—about 10 inches apart—since raised beds drain better and warm up faster, leading to stronger growth. But don’t go much closer than that, or you’ll sacrifice tuber size. Refer to our raised bed calculator o estimate the exact amount of soil required based on your bed dimensions, depth, soil type, and even delivery options.
How Spacing Affects Growth and Yield?
Spacing isn’t just about giving the plants elbow room; it directly impacts how many and how big your potatoes will be. When plants are too close together, they compete for nutrients, sunlight, and water, leading to stunted growth and smaller tubers. The plants may also become weak, making them more susceptible to pests and disease.
On the other hand, if you space them too far apart, you might be wasting valuable garden space.
While wide spacing can lead to larger tubers, the total yield per square foot might not be as high as it could be. It’s all about finding that sweet spot—around 12 inches between plants—where you get a good balance of size and yield.
I learned this the hard way one season when I experimented with planting potatoes just 6 inches apart to maximize space. Bad idea.
The foliage was overcrowded, which led to early blight, and the harvest was pitiful—mostly marble-sized potatoes that weren’t worth the effort.
Adjusting Spacing for Container and Small-Space Gardening
If you’re working with containers or small raised beds, don’t worry—you can still grow great potatoes with the right spacing strategy. The trick is to plant fewer seed potatoes but give them more vertical space to grow.
For grow bags or large containers (15 gallons or more), plant 3 to 4 seed potatoes per bag, spacing them at least 6 inches apart. As the plants grow, keep adding soil or straw to encourage more tubers to form along the buried stems.
If you’re planting in a square foot garden, aim for one potato plant per square foot. This keeps things compact while still allowing enough room for tuber formation. And if you’re using a tower or stacking system, space each seed potato 8 to 10 inches apart and focus on layering soil as they grow.
How Deep to Plant Potatoes?
I learned the hard way that potato planting depth isn’t a “one-size-fits-all” situation. The first time I planted potatoes, I dug shallow trenches, about 2 inches deep, thinking they needed room to breathe.
A few weeks later, I had weak, spindly plants and tiny tubers. The second year, I overcompensated, burying them 8 inches deep, only to find they struggled to sprout. Turns out, the right planting depth depends on a few key factors, and getting it right can mean the difference between a decent harvest and a bucket full of nothing.
The Recommended Depth for Planting Seed Potatoes
Most experts recommend planting seed potatoes 4 to 6 inches deep for optimal growth. This depth protects the tubers from sun exposure (which turns them green and toxic) while keeping them moist and cool. It also gives them room to form a strong root system, which translates to better yields.
But here’s something I wish someone had told me earlier—hilling is just as important as planting depth. When the plants grow about 6 inches tall, you should mound soil around the base, covering the lower stems.
This prevents tubers from being exposed to sunlight and encourages the plant to produce even more potatoes. I used to skip this step, and my yields were miserable compared to when I finally started hilling properly.
The Science Behind Deep vs. Shallow Planting
So why not just plant potatoes really deep and call it a day? Well, potatoes need warmth to sprout, and if they’re buried too deep, they take forever to emerge—or worse, they rot before breaking the surface.
On the flip side, planting them too shallow makes them more vulnerable to temperature fluctuations, moisture loss, and pests. Plus, without enough soil coverage, tubers end up exposed to sunlight, turning green and bitter.
One trick I learned from an old farmer is to go shallower in colder climates and deeper in warm ones. In cool spring soils, I plant closer to 4 inches deep so the sun can warm them up quickly.
But when planting late-season potatoes in hot weather, I go for 6 inches to keep them from overheating and drying out too fast.
How to Adjust Planting Depth Based on Soil Type?
Soil type plays a huge role in how deep you should plant potatoes. If you’ve got light, sandy soil, plant them deeper (closer to 6 inches) because the soil drains fast and won’t compact around the sprouts.
If your soil is heavy and clay-like, plant shallower (around 4 inches), or the sprouts might struggle to push through the dense soil.
The difference? Bigger, healthier plants and a lot more potatoes.
If you’re unsure, start with 4 inches and add more soil as they grow. That way, you’re covering your bases without the risk of planting too deep from the start.
Our Soil Calculator makes it easy to estimate the soil volume, weight, and cost required for your project.
Planting Potatoes the Right Way: A Step-by-Step Guide to Growing Perfect Spuds
Let’s go step by step so you can get a bountiful harvest.
Choose the Right Seed Potatoes
Don’t plant store-bought potatoes unless they’re organic—many are treated to prevent sprouting. Instead, get certified seed potatoes from a garden center or online supplier. Look for firm, healthy potatoes with at least one “eye” (that’s where the sprouts form).
Cut and Cure the Seed Potatoes
If your seed potatoes are large (think fist-sized), cut them into pieces, making sure each section has at least one or two eyes. Let the cut pieces sit for 24-48 hours to form a callous—this helps prevent rot in the soil.
Prepare the Soil
Potatoes love loose, well-draining soil with a slightly acidic pH (between 5.5 and 6.5). If your soil is heavy with clay, mix in compost or sand to improve drainage. Raised beds or mounds can help if your ground tends to hold water.
Plant at the Right Depth and Spacing
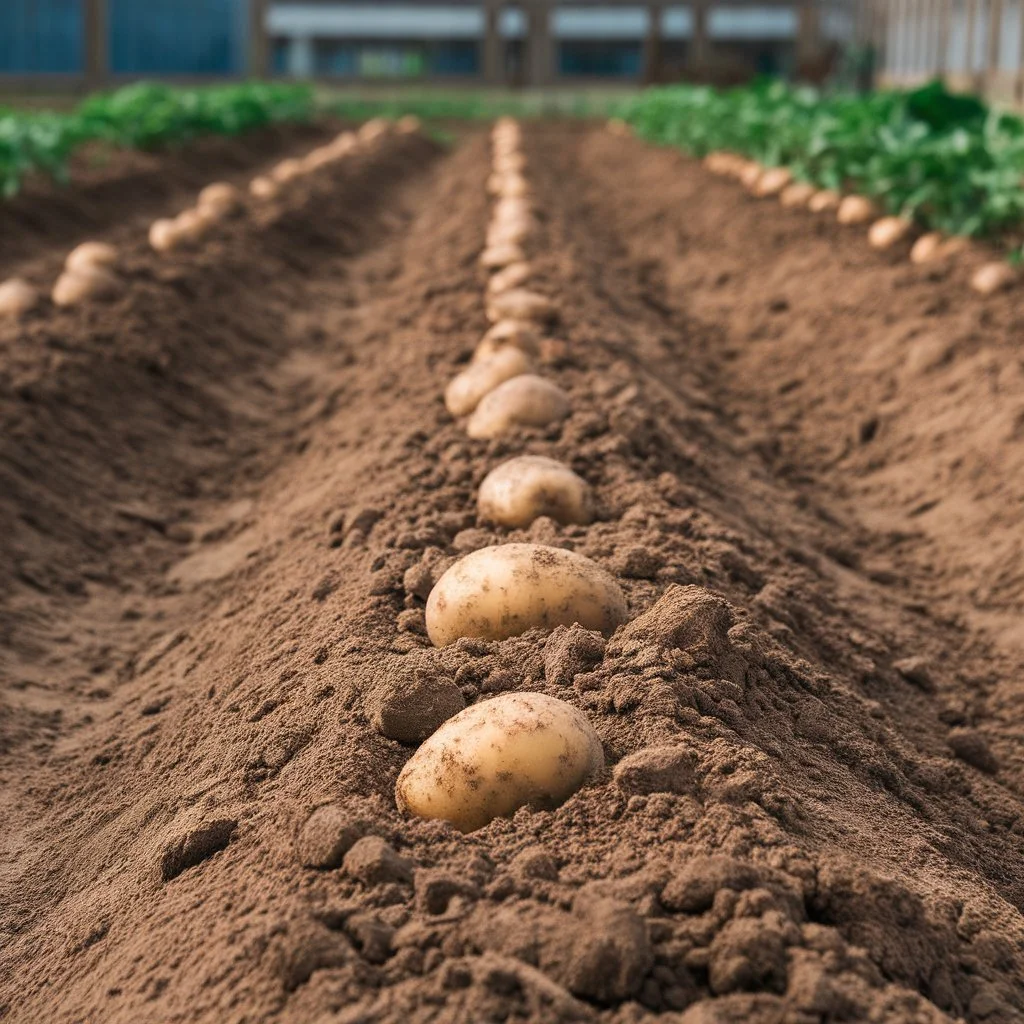
Dig trenches about 6-8 inches deep and place the seed potatoes cut-side down, sprout-side up. Space them about 12 inches apart, and keep rows 2-3 feet apart to give the plants room to grow. Cover them with a few inches of soil (not the full depth yet—you’ll add more soil as they grow).
Water and Mulch for Moisture Control
Potatoes need consistent moisture, but too much water can cause rot. Water deeply but infrequently, aiming for about 1-2 inches per week. Mulching with straw or dried leaves helps retain moisture and prevents weeds from competing with your plants.
Hill the Plants as They Grow
When the plants reach about 6 inches tall, start mounding soil around the stems, covering the lower leaves. This encourages more tubers to form and protects them from sunlight (exposed potatoes turn green and develop solanine, which is toxic). Repeat this process every few weeks.
Monitor for Pests and Diseases
Keep an eye out for potato beetles, aphids, and fungal diseases. Crop rotation and companion planting (like growing potatoes near marigolds) can help reduce pests naturally.
Harvest at the Right Time
New potatoes can be harvested as soon as the plants flower, but for full-sized tubers, wait until the foliage turns yellow and dies back. Gently dig up your potatoes with a fork—be careful not to stab them!
The Best Methods for Different Soil Types
Not all soil is created equal, and potatoes can be picky. Here’s how to work with different types of soil:
- Clay Soil: Heavy, compacted soil makes it hard for potatoes to expand. To fix this, mix in compost, sand, or well-rotted manure before planting. Raised beds or straw mounds work best to prevent waterlogging.
- Sandy Soil: Sandy soil drains well but dries out too fast. Add organic matter like peat moss or compost to help retain moisture. Water more frequently, but not so much that the soil stays soggy.
- Loamy Soil: This is the dream soil for potatoes—loose, nutrient-rich, and well-draining. If you’ve got loamy soil, you’re in luck! Just rotate your crops each year to prevent disease buildup.
- Rocky Soil: Small rocks aren’t a big issue, but if your soil is full of big stones, they’ll interfere with tuber development. Consider growing potatoes in containers or raised beds instead.
How to Plant Potatoes in Containers?
I used to think potatoes were one of those crops that needed a big garden bed or a whole farm to grow properly. Turns out, you can grow them right on your patio or balcony with just a simple container!
It’s one of the easiest and most rewarding ways to grow your own food—especially if you’re short on space.
The best part? You don’t have to worry about weeding, and harvesting is as easy as tipping the container over.
Growing potatoes in containers is a game-changer, but there are a few things you need to get right. First, choose the right variety—baby potatoes, Yukon Gold, or fingerlings tend to do best in containers.
You’ll also want a light, well-draining soil mix. I learned the hard way that heavy garden soil just compacts too much, leaving your potatoes struggling to grow. Instead, use a mix of potting soil and compost for that fluffy texture they love.
Now, when it comes to actually planting, the key is layering. Start with about 4 inches of soil in your container, place your seed potatoes (sprouts facing up), and cover them with another 3-4 inches of soil.
As the plants grow, keep adding soil until the container is nearly full—this encourages more potatoes to form along the buried stem. It might seem weird at first, but trust me, it works like magic!
Watering is another big deal. Potatoes like consistent moisture, but they hate being waterlogged. I’ve lost an entire batch before because I overwatered and the tubers rotted.
The trick is to keep the soil damp but not soggy—watering once a day in hot weather and every other day when it’s cooler should do the trick.
Patience is key with potatoes. After a few weeks, you’ll see leafy green stems shooting up, and in about 10-12 weeks, you’ll have baby potatoes ready for harvesting.
If you want larger ones, let them grow for 14-16 weeks. When the foliage starts turning yellow and dying back, that’s your cue to stop watering and let the potatoes “cure” in the soil for a few days before harvesting.
There’s nothing quite like the feeling of reaching into the soil and pulling out a handful of fresh, homegrown potatoes. It’s honestly addictive. Once you grow your own, you’ll never look at store-bought ones the same way again.
The Best Containers for Growing Potatoes at Home
When I first started growing potatoes, I used whatever I had lying around—old buckets, cheap plastic pots, even a cracked laundry bin. And while some worked, others failed miserably. If you want a solid harvest, choosing the right container makes all the difference.
Here are some of the best options:
- Fabric Grow Bags – These are hands-down my favorite. They’re breathable, which keeps the soil from getting too wet, and they have built-in handles for easy moving. I’ve had great results with 10-gallon grow bags, but if you want a bigger harvest, go for 15-gallon.
- Plastic Storage Tubs – If you have an old storage bin lying around, just drill some drainage holes in the bottom, and you’ve got a perfect potato container. They hold a lot of soil and are great for stacking layers.
- Large Buckets (5 Gallon or Bigger) – This is a budget-friendly option. Just make sure you drill holes in the bottom for drainage, or you’ll end up with rotted potatoes.
- Trash Cans – A deep trash can can grow a ton of potatoes if you’re short on space. Cut a few drainage holes near the bottom, and you’re good to go.
- Stackable Towers – If you’re feeling ambitious, some people use stackable containers where they add new layers as the plants grow. More layers = more potatoes!
The key with any container is drainage. If water sits at the bottom, your potatoes will rot. So no matter what you use, poke or drill holes in the base and set the container on bricks or pot feet to keep water flowing.
Step-by-Step Guide to Planting and Caring for Container Potatoes
- Choose the Right Potato Variety – Some types grow better in containers. Look for early or mid-season varieties like Yukon Gold, Red Pontiac, or Fingerlings.
- Pick a Deep Container – Aim for at least 12 inches deep and 10 gallons or larger. The deeper, the better.
- Prepare the Soil – Use a mix of potting soil, compost, and perlite for drainage. Avoid heavy garden soil.
- Plant the Seed Potatoes – Cut larger seed potatoes into pieces with at least one sprout (“eye”) on each. Let them dry for a day before planting.
- Layer the Soil – Start with 4 inches of soil, place your seed potatoes 6 inches apart, and cover them with 3-4 more inches.
- Water Consistently – Keep the soil damp but not soggy. Water more in hot weather.
- Hill the Soil as They Grow – Once the stems are 6 inches tall, add more soil around them, leaving just the top few leaves exposed. Repeat every few weeks.
- Provide Full Sun – Potatoes need at least 6 hours of sunlight daily.
- Watch for Pests – If you see tiny holes in the leaves, check for pests like aphids or potato beetles. Neem oil works great for organic pest control.
- Harvest When the Foliage Dies Back – Stop watering when the leaves turn yellow. Wait a few days, then tip the container over and collect your potatoes.
That’s it! With a little patience and care, you’ll have a fresh batch of homegrown potatoes ready to enjoy. And trust me—once you taste homegrown potatoes, you’ll never go back to store-bought.
How to Plant Potatoes in a Bucket?
When I first started growing potatoes in a bucket, I made the classic rookie mistake—I filled the bucket all the way with soil and shoved in way too many seed potatoes. Let me tell you, those poor potatoes had no room to breathe, and what I ended up with was a tangled mess of tiny, stunted spuds.
But after a few seasons of trial and error, I finally cracked the code on how to get a solid harvest from a simple bucket.
First things first, you need a bucket with good drainage. A standard 5-gallon bucket works great, but without holes at the bottom, you’ll end up with soggy, rotting potatoes. Use a drill (or a hammer and nail) to create at least 8–10 drainage holes on the bottom and a few around the lower sides.
This keeps the soil from getting waterlogged, which is the fastest way to ruin your crop.
Next, you’ll want a light, well-draining soil mix. Regular garden soil is too dense. I mix potting soil with compost and some perlite to keep things fluffy. If you want to get fancy, adding bone meal or organic fertilizer helps with strong root development.
Now for the fun part—planting. Start with about 4 inches of soil at the bottom of the bucket. Place your seed potatoes (with sprouts facing up) about 4-5 inches apart. This usually means only 2-3 potatoes per bucket if you want them to have enough room to grow properly.
Cover them with another 3-4 inches of soil and give them a deep watering. As they grow, you’ll keep adding more soil—this is called hilling—until the bucket is full.
What Size Bucket Works Best for Potato Growing?
When I first experimented with bucket gardening, I used whatever was lying around—old paint buckets, cheap plastic pails, even a storage tub once (big mistake, it cracked under the weight). But after testing different sizes, I can confidently say that 5-gallon buckets are the sweet spot.
A 5-gallon bucket (or something at least 12 inches deep and wide) provides enough space for a decent yield while being manageable. Anything smaller, and your potatoes will be crammed. Anything bigger, and you’re using way more soil than necessary.
If you want a bigger harvest, a 10- to 15-gallon bucket or container will allow you to plant 4-5 potatoes instead of just 2-3. But keep in mind—bigger buckets are heavier and harder to move.
Pro tip: Use food-grade buckets if possible (like old restaurant pickle or frosting buckets). Some plastic buckets can leach chemicals into the soil, and while I can’t say for sure if that’s a huge issue, I’d rather not take the risk.
Step-by-Step Guide to Planting Potatoes in a Bucket
Choose Your Bucket
- A 5-gallon bucket is ideal, but larger containers work if you want to grow more potatoes.
- Drill at least 8-10 drainage holes at the bottom and a few on the sides.
Prepare the Soil
- Use a light, fluffy mix (potting soil + compost + perlite).
- Avoid heavy garden soil—it compacts too much.
Plant Your Seed Potatoes
- Fill the bucket with 4 inches of soil.
- Place 2-3 seed potatoes sprout-side up, 4-5 inches apart.
- Cover with another 3-4 inches of soil.
Water Thoroughly
- Water until it drains out the bottom.
- Keep the soil moist but not soaked.
Hill the Potatoes as They Grow
- Once the plants grow 6-8 inches tall, add more soil to cover the lower leaves.
- Repeat every few weeks until the bucket is full.
Wait for Harvest Time
- Once the plants flower and die back, your potatoes are ready.
- Dump the bucket and enjoy your homegrown spuds!
How Many Potatoes Can You Grow in One Bucket?
This was the hardest lesson I learned—more is not better. My first attempt? I crammed five seed potatoes in a 5-gallon bucket, thinking I’d get a massive harvest. The result? A handful of tiny, underdeveloped potatoes.
For a 5-gallon bucket, stick to 2-3 potatoes max. This gives them enough space to grow properly. If you’re using a 10- to 15-gallon bucket, you can plant 4-5 potatoes.
Spacing is key—potatoes need about 4-5 inches of space between them. Overcrowding leads to smaller potatoes, poor airflow, and even rot if they stay too damp.
If you want a continuous supply, stagger your plantings. Start one bucket, then plant another every 2-3 weeks so you’re harvesting all season long.
How to Plant Sweet Potatoes?
I’ll admit it—when I first decided to plant sweet potatoes, I thought it would be as easy as sticking a sprout in the ground and waiting for magic to happen. Well, turns out, sweet potatoes don’t work like regular potatoes, and my first batch was a total disaster.
I planted them too early, didn’t space them right, and ended up with stunted little roots that looked more like shriveled-up carrots. But after a few tries (and a lot of trial and error), I figured out what works.
If you’re looking to grow your own sweet potatoes, follow this step-by-step guide to avoid my mistakes and get those big, delicious tubers you’re dreaming about.
1. Start with Healthy Sweet Potato Slips
Unlike regular potatoes, you don’t plant chunks of sweet potatoes with eyes. You need slips, which are the little sprouts that grow off a mature sweet potato. You can buy them from a garden center, or you can grow your own by placing an organic sweet potato in a jar of water, half-submerged, and waiting for it to sprout.
Once the slips are about 6 inches long with a few leaves, gently twist them off and place them in water until they develop roots.
Pro tip: Start this process indoors about 6-8 weeks before your last frost date to give your slips plenty of time to grow.
2. Choose the Right Planting Time
Sweet potatoes love the heat. Plant them when the soil temperature is consistently above 60°F (16°C), usually about 2-4 weeks after the last frost. If you plant too early in cold soil, the slips will just sit there and sulk (or worse, rot). I made this mistake once, and the results were not pretty—so be patient and wait for warm weather!
3. Prepare Your Soil for Maximum Growth
Sweet potatoes need loose, sandy, well-draining soil—not heavy clay or compacted earth. If your soil is too dense, they’ll struggle to expand and you’ll end up with weird, twisted roots. The best way to fix this? Add compost and sand to loosen things up, or plant them in raised beds with a mix of topsoil and organic matter.
Also, avoid soil that’s too rich in nitrogen. Too much nitrogen leads to tons of leafy vines but tiny, disappointing potatoes. Been there, done that.
4. Planting the Slips Properly
Once your soil is ready, it’s time to get those slips in the ground. Here’s how:
- Dig small holes 4-6 inches deep and space them 12-18 inches apart in rows that are 3 feet apart. Sweet potatoes need room to spread.
- Bury the slips up to the first set of leaves, making sure the roots are fully covered.
- Water them immediately after planting to help them settle in.
I used to plant them too close together, thinking I could squeeze in more plants, but trust me, overcrowding leads to small, tangled roots. Give them space!
5. Keep the Watering and Weeding in Check
For the first few weeks, water regularly to help the slips establish themselves. After that, sweet potatoes are pretty drought-tolerant, but they do best with about 1 inch of water per week. Avoid overwatering, though—too much moisture can cause the roots to rot.
Also, keep the area weed-free, especially in the early stages. A layer of mulch (like straw or shredded leaves) helps keep weeds down and maintains soil moisture.
6. Be Patient and Harvest at the Right Time
Sweet potatoes take their sweet time—90 to 120 days to mature. The leaves will start to yellow when they’re ready, but don’t be in a rush to dig them up. Wait until just before the first frost for the best size and flavor.
Use a digging fork to gently lift them out of the ground—don’t just yank them! The skin is delicate at first and bruises easily. Once harvested, cure them in a warm (80-85°F), humid place for about 10-14 days to bring out their natural sweetness before storing them in a cool, dry spot.
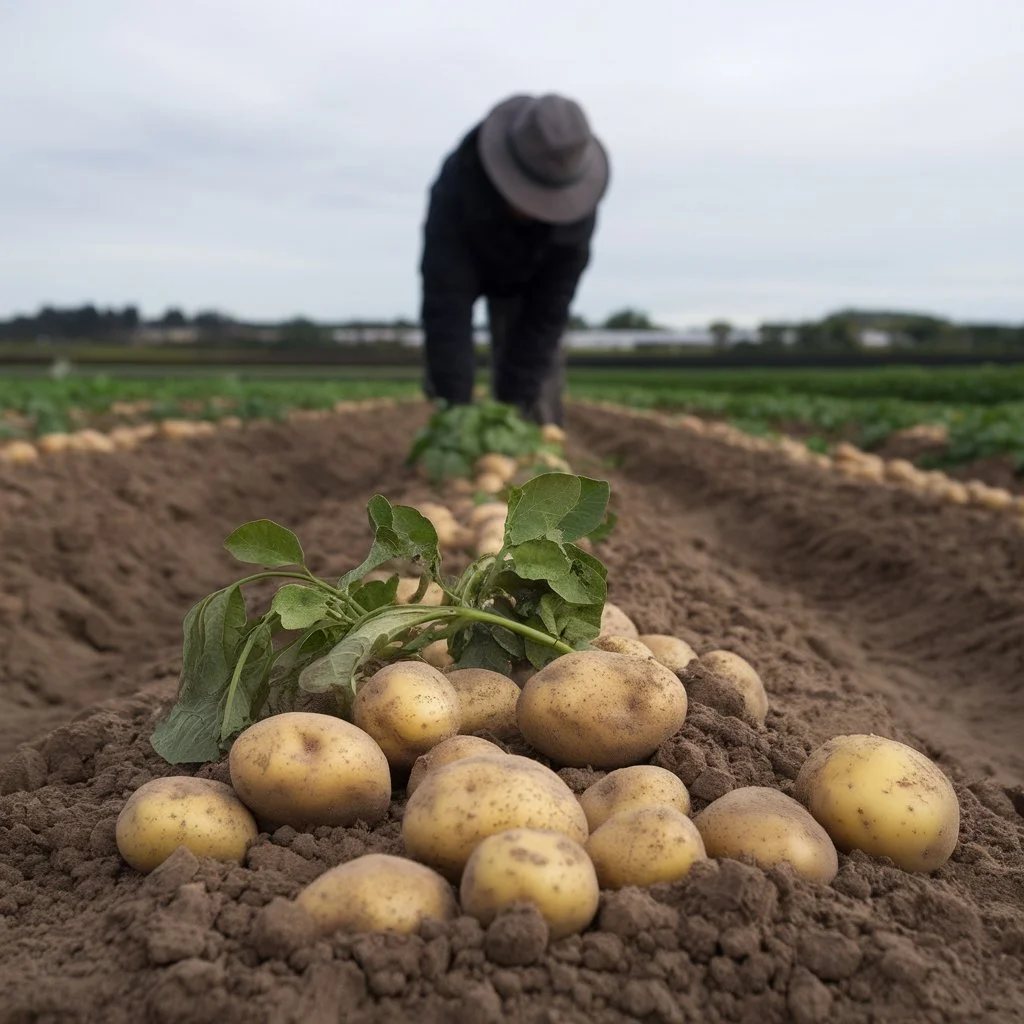
Signs Your Potatoes Are Ready to Harvest
Ah, the anticipation of homegrown potatoes! There’s something almost magical about reaching into the soil and pulling out those golden (or red, or purple) nuggets. But knowing exactly when to dig them up?
That’s where things get a little tricky. I’ve definitely been guilty of harvesting too early out of sheer impatience—only to find marble-sized spuds that weren’t quite there yet.
So, how do you know when potatoes are ready? First, check the vines. Once they start yellowing and wilting, your potatoes are likely mature. But don’t go grabbing the shovel just yet—wait another two weeks after the foliage dies back.
This allows the skins to toughen up, which helps with storage.
Another trick I swear by is the finger test. Gently dig into the soil near a plant and pull out one potato. If the skin rubs off easily, they need more time underground.
If the skin stays intact and feels firm, they’re good to go! For new potatoes (those small, thin-skinned ones), you can harvest earlier—around the time the plants start flowering.
Oh, and one big sign not to ignore? If the vines are still lush and green, your potatoes aren’t ready. Trust me, I learned this the hard way by digging up half-grown potatoes and completely regretting it.
When and How to Know Your Potatoes Are Fully Grown?
Patience is key with potatoes, but how do you know for sure that they’ve reached their full potential? Timing depends on whether you’re growing early-season, mid-season, or late-season potatoes.
- Early potatoes (like Red Norland) mature in 60-80 days and are best for fresh eating.
- Mid-season potatoes (like Yukon Gold) take 80-100 days.
- Late-season potatoes (like Russets) need 100-120 days and store the longest.
Beyond the number of days, here’s a simple test I use: Check the skin thickness. If you rub a potato between your fingers and the skin peels off, it needs more time. Another sign? Firmness. Press a potato with your thumb—if it feels soft, leave it alone. A fully mature potato will feel solid and dense.
If you’re still unsure, pull up one plant as a test. If the potatoes look big enough for your liking, the rest are probably good, too!
The Best Time of Day to Harvest for Freshest Potatoes
You might not think timing matters much, but trust me, it does. Potatoes are best harvested in the morning or late afternoon when the soil is cooler. If you dig them up in the blazing midday sun, they can dehydrate and even develop sunburned spots (yes, potatoes can get sunburned!).
I always aim to harvest on a dry day after a couple of days without rain. Wet soil makes it harder to pull them up without damaging them, and if they’re covered in mud, they take forever to dry for storage.
Another pro tip? Let them sit in the shade for a few hours after harvesting. This toughens the skins a bit before you bring them inside.
If you’re planning to store them long-term, skip the washing—just brush off the dirt and let them cure for about two weeks in a cool, dark place.
Can You Harvest Potatoes Early? Pros and Cons
Sometimes, you just can’t wait—and that’s okay! But there are pros and cons to digging up potatoes early.
Pros of Early Harvesting
✅ Sweeter, tender potatoes: Young potatoes have a thin, delicate skin that makes them perfect for roasting or boiling.
✅ Less risk of rot: If heavy rain is on the way, early harvesting can save your crop from rotting underground.
✅ Multiple harvests: Some gardeners take an early batch and leave the rest to mature, which is a great way to enjoy fresh potatoes over a longer season.
Cons of Early Harvesting
❌ Smaller yield: Potatoes bulk up in their final weeks. Harvesting early means you might get tiny spuds instead of full-sized ones.
❌ Shorter storage life: New potatoes don’t store as well as mature ones because their skins are too thin to protect them.
❌ You might miss out on full flavor: Mature potatoes have a richer, earthier taste, while early ones can be a bit milder.
So, should you harvest early? If you need a quick meal or are worried about the weather, go for it. Otherwise, patience will reward you with bigger, better potatoes!
Final Tips for a Successful Potato Harvest
So, you’ve nurtured your potato plants from tiny seed potatoes into full-grown, leafy beauties, and now you’re at the finish line—harvest time. But before you start yanking those plants out of the ground, let’s go over some last-minute tips to make sure you get the best possible yield.
First, be patient. I know, it’s tempting to start digging the second you see those leaves start to yellow, but waiting a little longer can make all the difference. If you want new potatoes (the small, tender ones), you can start harvesting a couple of weeks after the plants flower.
But for full-sized potatoes, wait until the tops have completely died back. Trust me, I learned this the hard way my first season—I dug up a few plants too early, and the potatoes were disappointingly small. Letting them stay in the ground longer allows the skins to thicken, which helps with storage.
Choose a dry day for harvesting. Wet soil makes the whole process a muddy mess and increases the risk of rot. Grab a garden fork (not a shovel—you don’t want to accidentally stab your spuds!) and start digging a foot away from the plant’s base.
Gently lift the soil and feel around with your hands to avoid damaging them. It’s kind of like a treasure hunt—there’s nothing quite like the thrill of unearthing a massive potato you had no idea was hiding down there.
Once they’re out of the ground, let them cure before storing. This is something I used to skip, and I always regretted it. Lay them out in a cool, dry place for about 10 days to let the skins toughen up, which helps them last longer in storage.
If you’re planning to eat them right away, no need to wait—just brush off the dirt and get cooking.
One more thing—don’t wash them before storing. It seems counterintuitive, but washing can introduce moisture that leads to rot. Instead, just brush off excess dirt and store them in a cool, dark place.
A root cellar is ideal, but a breathable container in a dark pantry works too.
